A wet motherboard can be a frustrating experience, especially if it’s in an essential device. But all hope isn’t lost. With the right approach, you can often repair a water-damaged motherboard. In this guide, we’ll explore how water affects motherboards, the possibility of repair, and the best methods to fix the damage.
How Does a Motherboard Get Wet?
Motherboards can get wet in several ways. A spilled drink is a common culprit, especially for laptops and desktop PCs. Sometimes, accidental exposure to rain or a flooded area can cause water intrusion. Even high humidity in certain environments can lead to condensation on the motherboard. These incidents may seem small, but they can significantly affect the board’s functionality.
One overlooked cause of water exposure is improper cleaning techniques. Some users try to clean dust or dirt from their devices with damp cloths, leading to moisture entering critical areas. Additionally, water cooling systems in PCs can sometimes develop leaks, leading to unexpected water damage.
Understanding how water enters your device can help you take preventive steps in the future. Whether it’s avoiding drinks near your computer or regularly inspecting water cooling systems, being cautious can save you from costly repairs.
Can a Motherboard Work After Getting Wet?
Can a motherboard work after getting wet? Yes, it can work, but only if handled correctly. Immediate action increases the chances of recovery. The first step is to cut off power immediately. Any delay can lead to short circuits, which cause permanent damage. Once power is disconnected, the motherboard stands a better chance of being salvaged if properly cleaned and dried.
The type of water exposure also plays a role. Clean water, such as from a water bottle or distilled water, is less harmful than water containing impurities, like saltwater or sugary drinks. Impurities can corrode components and leave behind residues that impact the board’s performance.
In many cases, users are surprised to find their devices functional after drying and cleaning. However, it’s crucial to inspect for any signs of damage before assuming everything is fine. A motherboard that powers on but has issues like random shutdowns or connectivity problems might still have underlying damage.
Why Does a Motherboard Get Damaged by a Water Spill?
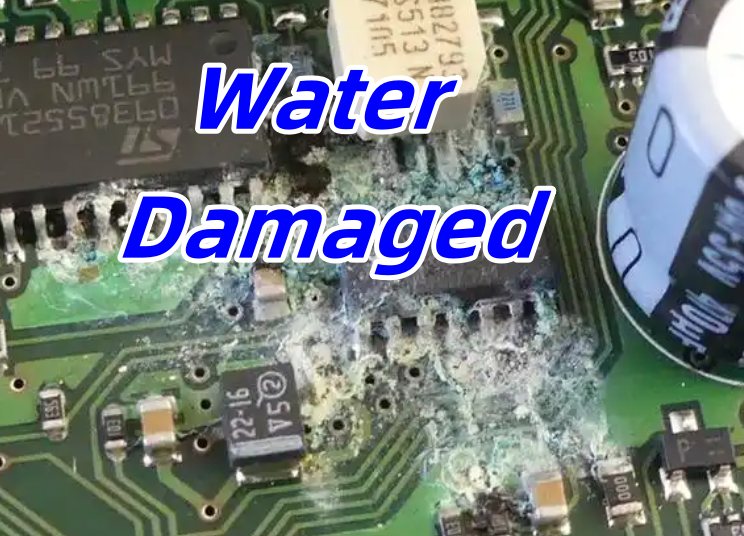
Water is highly conductive, and that’s the main issue. When water touches electronic components, it creates unintended connections between circuits. This often leads to short circuits, which damage sensitive parts like capacitors, resistors, and ICs. Additionally, minerals in water can corrode metal surfaces, worsening the situation if left untreated.
Even a small amount of water can cause damage. For instance, a few drops near the CPU socket or RAM slots can disrupt the entire system. Moreover, the longer water stays on the motherboard, the higher the chances of corrosion. This is why quick action is critical.
Another factor is electrochemical migration, a process where metal ions move due to the presence of water, leading to conductive paths that shouldn’t exist. Over time, this can cause permanent damage to the circuits, making it impossible to repair the board without replacing components.
Can a Water-Damaged Circuit Board Be Repaired?
In many cases, yes. If the damage isn’t too severe, cleaning and drying can restore functionality. However, it depends on how long the water remained on the board and if any components burned out. Circuit boards exposed to clean water usually have a better chance of recovery compared to those exposed to saltwater or other liquids with impurities.
Repairing a water-damaged motherboard involves more than just drying it. Components like capacitors or resistors may need replacement if they’ve been damaged. In some cases, solder joints may have weakened due to corrosion, requiring rework. If you’re comfortable with basic soldering, you can replace damaged parts yourself. Otherwise, seeking professional help is a good option.
It’s important to remember that even if the motherboard works after cleaning, its long-term reliability might be compromised. Regularly monitoring its performance and being prepared for potential failures can help you avoid sudden disruptions.
How to Clean a Water-Damaged Circuit Board?
Cleaning is a crucial step in the repair process. Here’s how to clean it properly:
1. Disconnect All Power Sources
Ensure the device is powered off and the battery is removed. For desktops, unplug the power cable. For laptops, remove the battery if possible. Cutting off power reduces the risk of short circuits.
2. Remove the Motherboard
Take out the motherboard carefully to access all areas. Removing it allows you to clean every component thoroughly, including areas under heat sinks and connectors.
3. Rinse with Isopropyl Alcohol (IPA)
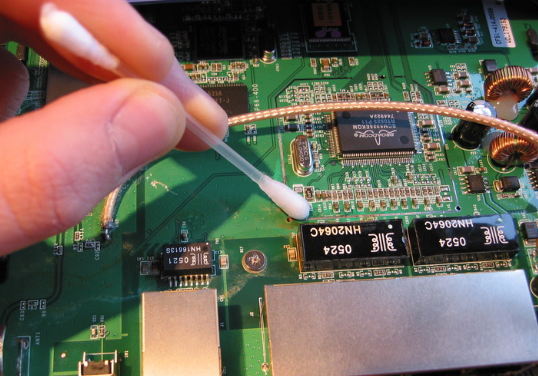
Use 90% or higher isopropyl alcohol. It helps displace water and clean contaminants. Unlike water, alcohol evaporates quickly and doesn’t leave residues. Gently apply it with a cotton swab or soft cloth.
4. Brush Away Residue
Use a soft-bristled brush to remove any residue or corrosion. Be gentle to avoid damaging components. A toothbrush with soft bristles works well for this purpose.
5. Dry Thoroughly
Let the motherboard air dry for at least 24 to 48 hours. Avoid using heat, as it can warp the board. Placing the board in a warm, dry room with good ventilation speeds up the process. Silica gel packets can also help absorb moisture.
5 Best Ways to Fix Water Damage on a Motherboard
1. Immediate Power Cut-Off
When water touches a motherboard, electricity flowing through the circuits can cause shorts. The first step is to disconnect the power supply instantly. Remove the battery if it’s a laptop. This action prevents further damage and improves the chances of recovery.
2. Dry the Motherboard Quickly
Time is critical. After removing the motherboard, use a dry cloth to absorb excess water. Placing it in a well-ventilated area for natural drying is ideal. If available, a silica gel packet can help absorb moisture faster. Avoid using hair dryers, as they can push water deeper into the components.
3. Use Isopropyl Alcohol for Cleaning
Water alone doesn’t remove all impurities. Isopropyl alcohol not only displaces water but also helps clean mineral deposits. Apply it carefully with a brush or cloth. Alcohol evaporates quickly, which speeds up the drying process.
4. Inspect for Corrosion
Water can leave behind corrosion, especially if left untreated. Inspect the motherboard for any signs of rust or buildup. Use a magnifying glass if needed. Light corrosion can be cleaned with alcohol and a brush, but heavy corrosion may require professional repair.
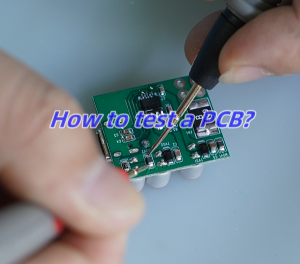
5. Test the Motherboard
After cleaning and drying, reassemble the device and test it. Connect only essential components first. If the motherboard powers on and functions normally, the repair was successful. If not, check for any loose connections or consider seeking professional help.
Frequently Asked Questions
1. How long should I wait before powering on a wet motherboard?
Wait at least 24 to 48 hours. Ensure the motherboard is completely dry before attempting to power it on.
2. Can I use rice to dry a wet motherboard?
While rice can absorb moisture, it’s not recommended. It may leave dust and particles inside the device. Silica gel or natural air drying works better.
3. Is it safe to use heat to dry a motherboard?
No, applying heat can warp the board and damage components. Stick to air drying or using isopropyl alcohol for quicker results.
4. What if my motherboard doesn’t work after cleaning?
If the motherboard doesn’t power on after cleaning and drying, it might have sustained severe damage. Professional repair or replacement may be necessary.
5. Can I prevent water damage in the future?
Yes. Using waterproof covers, avoiding liquids near devices, and storing electronics in dry environments help reduce the risk of water damage.
Conclusion
Water damage doesn’t always mean the end for a motherboard. With quick action, careful cleaning, and proper drying, many boards can be saved. If you’re unsure or the damage seems extensive, seeking professional assistance is a smart choice. Protecting your motherboard from future spills can save time and money. Choose reliable repair services and preventive measures to keep your devices safe and functional.


