pcb
Home > Blog

Posts Tagged ‘smt process’

What is SMT POP (Package on Package) Process?
星期二, 3 9 月, 2024

Package on Package (PoP) means that a logical package with high integration at the bottom is superimposed on another matching large-capacity memory package to form a new package as a whole. Laminated packaging can be the same shape of the logic and memory chip package can be reintegrated, without the use of stacked logic-memory chip packaging method in the manufacturing and commercial problems. This new form of high-density packaging is mainly used in a variety of consumer electronic products such as smart phones, digital cameras, and portable wearable devices.

What is SMT POP (Package on Package) Process?

What Does POP Do in Assembly?

In an era where consumer electronics are becoming smaller and more powerful, saving PCB space is crucial. PoP allows for the vertical stacking of components, such as processors and memory, on top of each other. This is especially important in devices like smartphones, tablets, and wearable technology, where space is at a premium.

One of the significant advantages of PoP is the ability to individually test and replace the stacked components before final assembly. This step-by-step verification ensures higher yields during manufacturing, as defective components can be identified and replaced early in the process. Additionally, since each component is tested separately, the overall cost of assembly can be reduced, as fewer defective products reach the final stages of production.

Moreover, PoP provides manufacturers with the flexibility to mix and match different types of components. For example, different memory types can be combined with various processors, depending on the requirements of the final product.
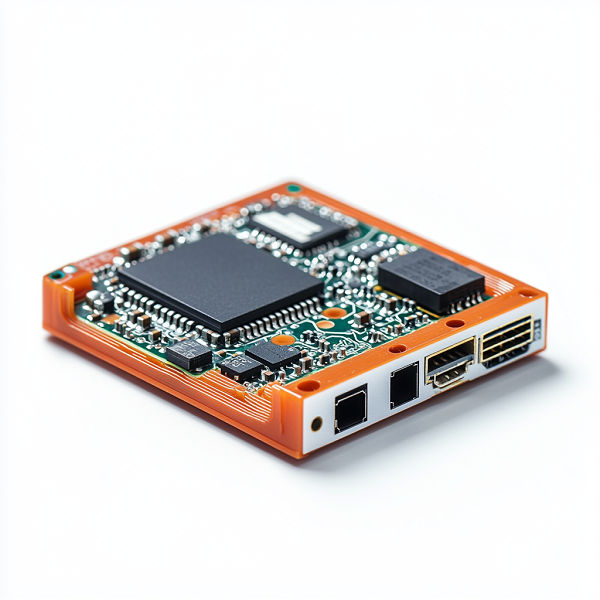
SMT POP Structure

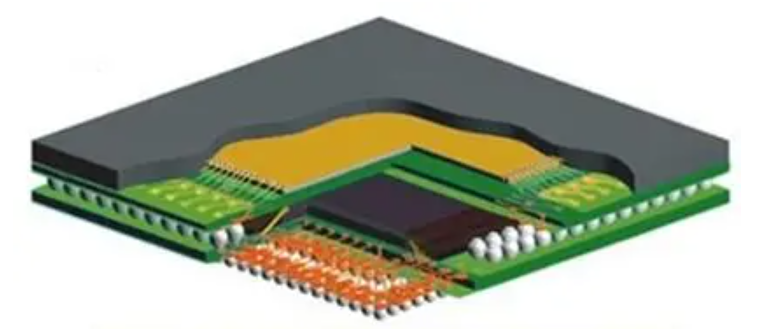
POP stacking assembly typically involves placing components on top of each other, usually combining logic and memory devices. The structure can range from 2 to 4 layers, with memory PoP going up to 8 layers. Although the overall height increases slightly, each component can be tested individually before assembly, ensuring higher yield rates and minimizing total assembly costs.

PCB Assembly Layers of PoP:

What is SMT POP (Package on Package) Process?

Amkor PoP Typical Structure:

Bottom PSvfBGA (Package Stackable very thin fine pitch BGA)

Top Stacked CSP (fine pitch BGA)

Bottom PSvfBGA Structure:

Dimensions: 10-15mm

Pad pitch: 0.65mm, with bottom ball pitch at 0.5mm (0.4mm)

Substrate: FR-5

Ball material: 63Sn37Pb/Pb-free

Top SCSP Structure:

Dimensions: 4-21mm

Bottom ball pitch: 0.4-0.8mm

Substrate: Polyimide

Ball material: 63Sn37Pb/Pb-free

Ball diameter: 0.25-0.46mm

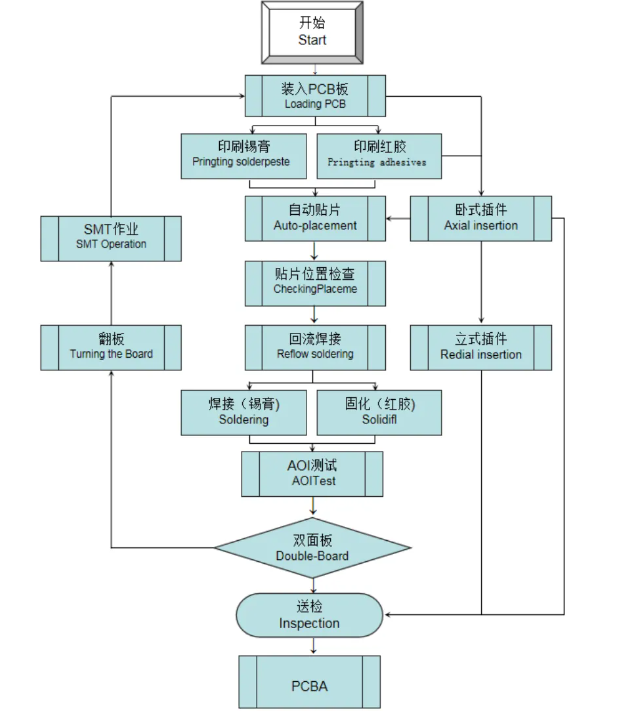
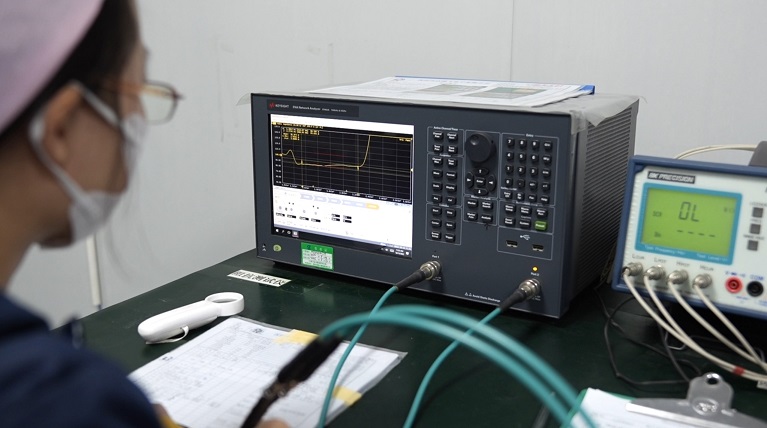
SMT POP Manufacturing Process

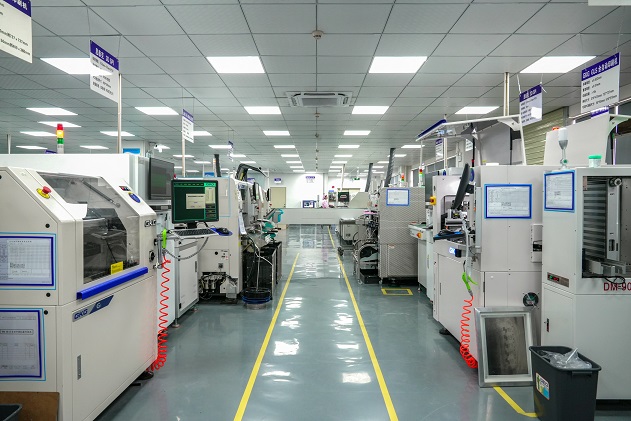
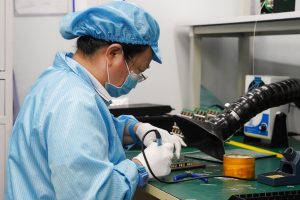
The manufacturing process for Package on Package technology is a multi-step procedure that demands precision and careful attention to detail to ensure the successful assembly of high-performance electronic devices. Here’s an extended explanation of each stage in the PoP manufacturing process:

What is SMT POP (Package on Package) Process?

1. Non-PoP Side Component Assembly

The PoP process begins with the assembly of components on the non-PoP side of the PCB. This involves standard SMT assembly processes:

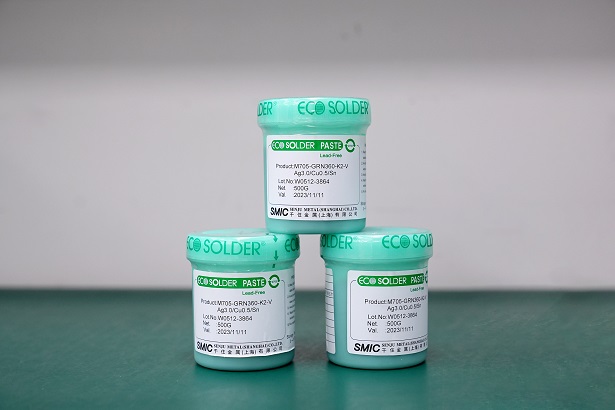
  • Stencil Printing: Solder paste is applied to the designated pads on the PCB using a stencil.
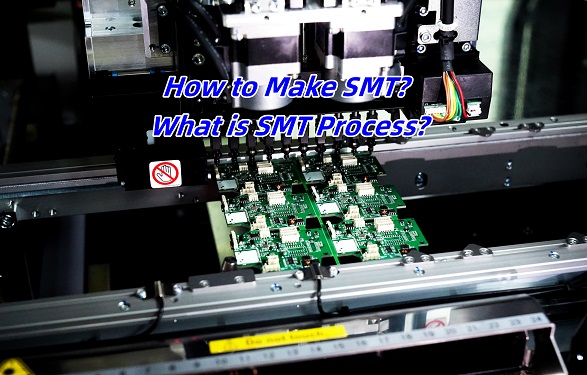
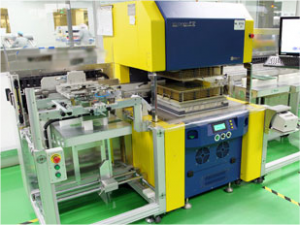
  • Component Placement: Using automated pick-and-place machines, surface-mount components are accurately positioned onto the solder-pasted pads.
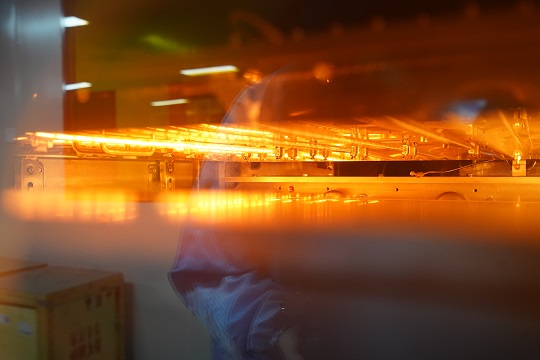
  • Reflow Soldering: The PCB is then passed through a reflow oven, where the solder paste is heated to its melting point, securing the components to the board.
  • Inspection: The solder joints are inspected using Automated Optical Inspection (AOI) to ensure that they are correctly formed and that the components are properly placed.

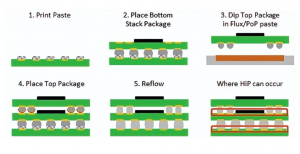
2. Solder Paste Printing on the PoP Side

After completing the assembly on the non-PoP side, the PCB is flipped, and solder paste is printed on the pads where the bottom PoP component will be placed. This step is crucial, as the quality of the solder paste application directly affects the integrity of the solder joints between the PoP components.

3. Placement of Bottom Components and Other Devices

The bottom components, which typically include the logic processor, are placed onto the solder-pasted pads using high-precision pick-and-place equipment. This placement must be extremely accurate to ensure proper alignment with the top component in the subsequent steps.

4. Flux or Solder Paste Dipping for the Top Components

Before the top component is placed, it is dipped in flux or a thin layer of solder paste. This dipping ensures that the solder joints between the top and bottom components are robust and reliable. The flux helps to clean the surfaces and promote better solder flow during reflow, while the solder paste provides additional material for the solder joints.

5. Placement of Top Components

The top component, typically a memory chip, is then placed onto the bottom component. This step requires precise alignment to ensure that the solder balls on the top component correctly match the pads on the bottom component. Any misalignment can lead to defective connections and, consequently, a malfunctioning device.

6. Reflow Soldering and Inspection

Once the top component is placed, the entire assembly is subjected to reflow soldering. During this process, the PCB passes through a reflow oven where the solder paste re-melts, forming solid connections between the components. The temperature profile during reflow must be carefully controlled to prevent warping or damaging the delicate PoP structure.

After reflow, the assembly is inspected using AOI or X-ray inspection to verify the quality of the solder joints, particularly the hidden joints between the top and bottom components. X-ray inspection is often employed because it can penetrate the layers and provide a clear view of the solder joints, ensuring there are no voids, misalignments, or insufficient solder.

7. Final Testing and Quality Control

The assembled PoP structure undergoes a series of electrical tests to ensure functionality. This includes testing for continuity, shorts, and the performance of the integrated components. High-quality PoP assemblies should pass all functional tests without issue, confirming that the solder joints and component placements are reliable.

8. Packaging and Shipping

After passing the final tests, the PoP assemblies are cleaned to remove any residual flux or contaminants. They are then packaged according to the customer’s requirements and prepared for shipping. Proper packaging is essential to protect the sensitive PoP structures from damage during transit.

POP Design Considerations

Factors affecting the spatial relationship include substrate and component design, substrate manufacturing processes, component packaging processes, and SMT assembly processes. Key aspects to consider are:

  • Pad design
  • Solder mask opening
  • Ball size and height variation
  • Amount of flux or solder paste applied
  • Placement accuracy
  • Reflow environment and temperature
  • Warpage of components and substrate
  • Bottom component molding thickness

What are the advantages of POP smt process?

POP is mainly a system integration 3D package developed for mobile devices, and its structure mainly has the following characteristics.

  1. Storage devices and logic devices can be freely combined, and can be tested or replaced separately to ensure the yield.
  2. POP is stacked in the vertical direction, saving the board area and improving the system packaging density.
  3. The vertical interconnection of stacked devices replaces the traditional two-dimensional package interconnection, which can realize faster data transmission between logic devices and storage devices.

With the development of technology, the following main types of POP structures have emerged.

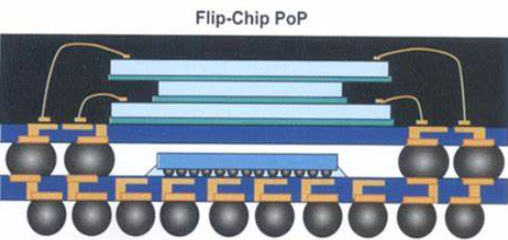
  • Solder Ball Connected PoP

Logic chips have more I/0 ports, so they are often packaged with Flip Chip (FC) technology and used as the bottom component. The bottom chip adopts Capillary Under Fill (CUF) technology.

  • MLP Connected PoP

In order to develop a thinner PoP Package structure, MoldimgLaser Package (MLP) technology came into being, also known as Through Mold Via (TMV) technology on the market. The method is to first weld the tin ball around the bottom chip and directly plastic seal, and then use laser perforation to expose the tin ball for subsequent connection with the upper components.

  • Folded and BVA Connected PoP

In order to meet the requirements of thin size, strong function and large I/0 number of PoP products, flexible circuit boards are used to connect various package components and fold to form PoP structure, and BVA (Bond Via Array) is used to improve product performance and reduce pin spacing.

POP Applications

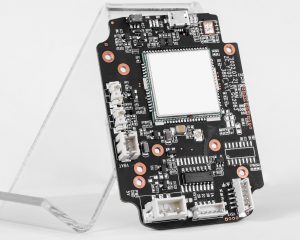
1. Smartphones: PoP is widely used in smartphones, like the Meizu 16S, for integrating application processors and memory.

2. Wearable Devices: PoP is commonly used in next-generation wearable devices.

3. Electronic Watches: PoP packaging is key for improving performance and reducing costs in electronic watches.

4. Earphones: The Meizu POP Pro noise-cancelling earphones utilize PoP technology.

5. Health Watches: Huami’s Amazfit Pop, one of the most affordable blood oxygen monitoring watches, uses PoP technology.

For more information about our POP Assembly capabilities, please contact us any time! We can be reached via email at sales@bestpcbs.com, or toll free at +86-755-2909-1601.

You may also like

How to Make SMT? What is SMT Process?
星期四, 15 8 月, 2024

What is the SMT?

Surface Mount Technology (SMT) is a production technique used to attach electronic components directly onto the surface of a printed circuit board (PCB). This method enables automated manufacturing to handle most of the assembly process needed to create a functioning board. Components attached in this way are known as surface-mount devices (SMDs). Unlike traditional methods, SMT does not involve inserting components through holes in the board. Instead, components are soldered directly onto the surface using reflow soldering.

Originally known as Planar Mounting, SMT was pioneered by IBM in the 1960s for small-scale computer production, replacing the earlier Through-Hole Technology. However, SMT didn’t gain widespread use until 1986, when surface-mounted components achieved 10% market penetration. By 1990, SMDs had become a dominant feature in most high-tech circuit card assemblies (CCAs).

How to Make SMT? What is SMT Process?

What is the process of SMT manufacturing?

The SMT manufacturing process can be divided into three main stages: solder paste printing, component placement, and reflow soldering. Due to the complexity of the process, each stage is further broken down as follows:

1. Component and PCB Preparation

This initial stage involves selecting surface-mount components (SMCs) and designing the PCB. The board typically features flat copper pads plated with silver, tin-lead, or gold, which are called solder pads. These pads do not have holes and are used to support the pins of components like chips and transistors.

Another crucial element is the stencil, which is aligned with the solder pads to define the placement of solder paste during the next stage. The PCB and all materials involved must be thoroughly inspected to ensure there are no defects before proceeding with production.

2. Solder Paste Printing

Solder paste printing is a critical phase in SMT production. A stencil and squeegee are used to apply solder paste at an angle of 45° to 60°. The solder paste itself is a combination of powdered metal solder and flux, which temporarily holds components in place and cleans the soldering surfaces of impurities.

The paste is applied to the solder pads, connecting the SMCs to the PCB once melted in the reflow oven. It’s essential that the correct amount of paste is applied to each pad, as improper application can prevent proper connections from forming during reflow.

3. Component Placement

In this stage, pick-and-place machines accurately position components on the PCB. The machines use vacuum or gripper nozzles to remove each component from its packaging and place it onto the board. These machines are fast and precise, capable of placing up to 80,000 components per hour.

Precision is key here, as any misplaced components could lead to costly rework once soldered.

4. Reflow Soldering

After components are placed, the PCB is moved into the reflow oven for soldering. The board passes through several temperature-controlled zones:

  • Preheat Zone

The temperature is gradually increased to between 140℃ and 160℃ at a rate of 1.0℃-2.0℃ per second to ensure the board and components heat evenly.

  • Soak Zone

The PCB is maintained at this temperature for 60 to 90 seconds to stabilize the heat across the entire board.

  • Reflow Zone

The temperature is then raised to 210℃-230℃ to melt the solder paste, bonding the components to the PCB. The molten solder’s surface tension keeps the components in place during this process.

  • Cooling Zone

In the final zone, the solder is rapidly cooled to solidify the connections and prevent any soldering defects.

For double-sided boards, this process may need to be repeated, either using solder paste or adhesive to secure components.

How to Make SMT? What is SMT Process?

5. Cleaning and Inspection

Once the soldering process is complete, the PCB is cleaned and inspected for any defects. This is done using magnifying lenses, Automated Optical Inspection (AOI), flying probe testers, X-ray inspection, and other tools to ensure accuracy. Any flaws are repaired before the finished product is packaged and stored.

What are the basics of SMT?

SMT simplifies assembly by reducing the need for drilled holes and using smaller components. Unlike traditional through-hole components, SMT parts are placed on the surface of the PCB, making the design more compact.

The basic elements of SMT include:

  • PCBs: The base for components, designed with specific pads for each part.
  • Solder Paste: A mixture of metal solder particles and flux, used to create a bond between components and the board.
  • SMT Components: Small electronic parts, such as resistors, capacitors, and ICs, that attach to the PCB.

The transition from through-hole technology to SMT has improved manufacturing speed and performance in electronics.

How do I prepare for SMT?

As the core step of electronic product manufacturing, PCBA’s preparation before assembly directly affects the quality and reliability of the final product. The following is a detailed analysis from multiple dimensions:

1. Component inspection

Before assembly, all electronic components must undergo strict screening and inspection. This includes checking that the component type, package, number of pins, etc. are consistent with the BOM (Bill of Materials), as well as performing the necessary electrical performance tests.

2. Take ESD measures

Static damage to electronic components is invisible, but the consequences are serious. Therefore, when distributing materials and testing IQC, warehouse personnel should wear anti-static gloves, reliably ground the instrument, and lay anti-static rubber MATS on the work surface. During the assembly process, the operator should also wear anti-static clothes, anti-static bracelets and other protective equipment to ensure that the workbench and equipment are well grounded.

3. Cleanliness requirements

The work workshop and workbench must be kept clean to prevent contaminants such as dust and impurities from entering the circuit board, affecting the accuracy and quality of the patch. Clean the work surface and workshop floor regularly. Smoking, eating and drinking are strictly prohibited in the work area.

How to Make SMT? What is SMT Process?

4. Temperature and humidity control

Appropriate temperature and humidity should be maintained in the workshop to reduce static electricity generation and the impact on electronic components. It is usually recommended that the temperature be controlled at 23±3oC and the humidity be controlled at 45% to 70%RH. This environment helps to ensure the quality of welding and the stability of electronic components.

5. PCB appearance check

Before assembly, the PCB board should be visually inspected to confirm whether it is complete, whether the surface coated solder resistance layer is intact, and whether there are obvious short circuits and defects. Use a multimeter to check whether there is a short circuit between the power supply and the ground terminal on the printed board, and ensure that the printed board is fine.

6. Check the software and hardware

When the PCBA needs to be upgraded, the motherboards produced in different time periods should not be mixed together to avoid mixing problems. Before assembly, check whether the final use of the software is in accordance with customer requirements to ensure that the software and hardware are compatible and correct.

7. Welding process selection

According to the layout of the circuit board and the characteristics of the components, select the appropriate welding process (such as wave soldering, reflow welding, hot blast furnace welding, etc.). Each welding method has specific requirements for the placement, orientation and spacing of components that need to be planned in advance.

8. Manually prepare the post-welding plug-in components

For some components that cannot be automatically welded (such as large connectors, heat sinks, etc.), manual plug-in assembly is required. This requires the operator to have a wealth of experience and skilled skills to ensure the accuracy and robustness of the plug-in.

9. Perform ESD operations

During operation, use an ESD workbench and an ESD container to hold components and semi-finished products. All welding equipment should be grounded, the electric soldering iron must be anti-static type, and tested before use.

10 Cleaning and protective treatment

After the assembly is complete, the product needs to be cleaned to remove the residue and contaminants generated during the welding process. At the same time, appropriate protective treatment of the product, such as spraying three anti-paint, etc., to improve the product’s moisture, dust and corrosion resistance.

Which solder paste is used in SMT?

The type of solder paste used in SMT assembly process depends on several factors, such as the materials of the components and the PCB, as well as the operating conditions of the finished product. Generally, there are mainly include high temperature solder paste, ‌ medium temperature solder paste and low temperature solder paste. ‌

  • High temperature solder pastes are commonly used in applications where higher temperatures are required for welding. ‌ has a higher melting point and ‌ is suitable for welding electronic components with specific temperature requirements. ‌
  • Medium temperature solder paste and low temperature solder paste are suitable for medium and low temperature welding respectively, ‌ select the appropriate solder paste type according to the specific welding needs. ‌
How to Make SMT? What is SMT Process?

In addition, ‌ solder paste can also be classified according to the flux activity level, ‌ including “R” (‌ inactive) ‌, ‌ “RMA” class (‌ moderate activity) ‌, ‌ “RA” class (‌ completely reactive) ‌ and “SRA” class ‌ (‌ super activity). ‌ Different types of activity levels are suitable for different application scenarios, ‌ for example, ‌ “R” grade is usually used for welding aerospace, ‌ avionics products, ‌ and “RA” grade is suitable for consumer electronics products. ‌ This classification allows users to choose the right solder paste according to the specific application needs and cleaning process requirements. ‌

What temperature should a soldering iron be for SMT?

The right temperature for soldering in SMT can vary depending on the solder paste and components you’re using. Typically, the soldering iron should be set between 250°C and 300°C. Using a lower temperature might not properly melt the solder, while a higher temperature could damage components or the PCB.

Of course, different types of PCB requires different temperature. For example, ceramic PCBs has fragile surface, so a lower temperature is good.

What are the disadvantages of SMT?

  • Small volume (due to the limitation of components)
  • Fragility
  • High soldering requirements
  • Easily damaged or dropped
  • Challenging to inspect
  • Complex process and inspection
  • High equipment investment

How to solder SMT at home?

Soldering SMT components at home can be tricky, but with the right tools and techniques, it’s doable. Here’s a quick guide:

  1. Tools: You’ll need a fine-tip soldering iron, tweezers, solder paste, and flux. You may also want a magnifying glass or microscope for better visibility.
  2. Apply Solder Paste: Use a small amount of solder paste on the pads of the PCB where you want to place your components.
  3. Place Components: With tweezers, carefully place the components onto the solder paste. Make sure they are properly aligned with the pads.
  4. Reflow the Solder: If you have a reflow oven, you can use it to heat the board. Alternatively, a hot air rework station can also work.
  5. Inspect: Once the solder has cooled, check the connections. If necessary, reheat or add more solder to fix any weak joints.

Best Technology is a one-stop PCB & PCB assembly manufacturer founded in 2006, with 5 assembly lines. If you have needs for PCB and PCBA fabrication, we can be your reliable supplier from prototypes to bulk production. In addition, we have SMT factory in Vietnam, if you don’t want to make smt in Shenzhen, then we can support you in Vietnam. Welcome to contact us if you have such PCB and PCBA projects.

You may also like

What is SMT Process in PCB Manufacturing? – Best Technology
星期三, 14 8 月, 2024

SMT process is one of the most commonly used processes in PCBA or box build assembly products. It also called surface mount process. It is reliable connection between electronic components and printed circuit boards can be realized through the precise mounting and welding technology of the SMT machine.

What is an SMT Process?

The SMT process is a method used to mount electronic components directly onto the surface of a printed circuit board (PCB). Unlike traditional through-hole technology, where components are placed in drilled holes, SMT components are placed on the board’s surface.

SMT enables the creation of smaller devices without compromising performance. By eliminating the need for drilled holes, it also speeds up production, reducing costs and improving efficiency.

What is SMT Process in PCB Manufacturing? - Best Technology

What is the Purpose of SMT?

The primary purpose of SMT is to streamline the manufacturing process while enhancing the functionality and reliability of electronic devices. SMT allows manufacturers to produce smaller, more complex circuits that are essential for today’s technology-driven world. From smartphones to medical devices, SMT plays a critical role in the development of products that we rely on daily.

Moreover, SMT offers flexibility in design, allowing engineers to create intricate circuits that would be impossible with traditional methods. The process also supports higher levels of automation, reducing the risk of human error and ensuring consistent quality across large production runs. In essence, SMT is about improving efficiency, quality, and innovation in electronics manufacturing.

Terms Related to SMT

Solder Paste

A mixture of powdered solder and flux used to bond SMT components to the PCB. It’s applied to the board using a stencil and is essential for creating strong, reliable connections.

Pick and Place Machine

An automated machine that picks up components and places them onto the PCB with high precision. This machine is vital in ensuring that components are positioned accurately before soldering.

Reflow Oven

After the components are placed on the PCB, the board is passed through a reflow oven. The heat melts the solder paste, securing the components in place.

Stencil

A metal or plastic template used to apply solder paste to specific areas of the PCB. The stencil ensures that the paste is only applied where needed, preventing defects.

Flux

A chemical agent that cleans the surfaces of the components and the PCB, ensuring a strong bond during the soldering process.

PCB

The bare board without any components on its surface. The board that serves as the foundation for electronic components. It has conductive pathways that connect the components and allow them to function together.

PCBA

When a PCB is surface-mounted or through-hole-mounted with components, we call this semi-finished product a PCBA. It can further assemble with other PCBAs and an enclosure to become a complete product or box-build we call it.

SMD

Surface mount device, it is an electronic component for SMT manufacturing. Compared with PTH components for PTH assembly, SMDs have a much smaller weight and size about 1/10 of a PTH component of the same function.

How Many Steps are in the SMT Process?

The SMT process involves several detailed steps, each essential for ensuring the quality and reliability of the final electronic product. Below is a comprehensive look at these steps:

Step 1: Components Incoming Inspection

Before the assembly begins, all components undergo an incoming inspection. This step is crucial to ensure that all parts meet the required specifications. It helps in identifying any defects or discrepancies in the components, which could affect the final product’s quality.

What is SMT Process in PCB Manufacturing? - Best Technology

Step 2: PCB Quality Control

The next step is to inspect the PCB itself. This involves checking for any manufacturing defects, such as scratches, misalignments, or irregularities in the copper layers. Ensuring the PCB is flawless is vital because any defect can lead to failure in the final assembly.

Step 3: Stencil Preparation

Stencil preparation is critical for the accurate application of solder paste. The stencil must be aligned correctly with the PCB to ensure the solder paste is applied precisely to the pads where components will be placed. This accuracy is key to avoiding soldering defects.

Step 4: Solder Paste Applying

Solder paste is applied to the PCB through the stencil. The paste contains tiny balls of solder mixed with flux, and it’s applied to the areas where components will be soldered. Proper application of the solder paste is essential for creating reliable solder joints.

Step 5: SPI (Solder Paste Inspection)

After applying the solder paste, it’s inspected using SPI (Solder Paste Inspection) equipment. This step checks the volume, height, and position of the solder paste on the PCB. Any deviations from the ideal paste deposit can lead to defects, so this inspection helps ensure consistency and quality.

Step 6: Pick and Place Components

The pick and place machine automatically places components onto the PCB. Misplaced components can lead to electrical failures, so this step is critical for the overall success of the process.

Step 7: Reflow Soldering

Once the components are placed, the PCB is passed through a reflow oven. The heat in the oven melts the solder paste, creating a solid electrical connection between the components and the PCB. The reflow process must be carefully controlled to avoid overheating or insufficient soldering.

Step 8: AOI (Automated Optical Inspection)

After reflow soldering, the board undergoes AOI. This inspection process uses cameras to check for soldering defects, such as bridges, misaligned components, or insufficient solder. AOI helps catch defects early, reducing the chances of failures in the final product.

Step 9: X-RAY (Only for BGA or Fine-Pitch Components)

For boards with Ball Grid Array (BGA) or fine-pitch components, an X-ray inspection is performed. This step allows for the inspection of solder joints that are hidden beneath the components, ensuring that they are properly formed and free of defects.

Step 10: FAI (First Article Inspection)

The first board produced in a batch undergoes FAI, where it is thoroughly inspected to ensure that all processes and setups are correct. This step serves as a final check before full production begins, helping to confirm that everything is in order.

Step 11: Function Testing

The final step in the SMT process is function testing. This involves testing the completed PCB to ensure it functions as intended. Function testing is essential to verify that the board meets the required specifications and operates correctly in its intended application.

SMT Process Flow Chart

A flow chart is a visual representation of the SMT process, showing each step in sequence. This chart is essential for understanding how the process works and identifying potential areas for improvement. Here’s a basic flow chart of the SMT process:

What is SMT Process in PCB Manufacturing? - Best Technology

How Do I Prepare for SMT?

Preparing for the SMT process requires careful planning and attention to detail. Here are some tips to help you get ready:

  • Design for Manufacturability (DFM)
  • Material selection
  • Stencil
  • Equipment calibration
  • Quality control
  • Training

Best Technology – Your Turn-key PCB & PCBA Supplier

At Best Technology, we offer a range of value-added services, including IC programming, functional testing, conformal coating, thermal aging, and box-build assembly, ensuring you receive fully assembled and ready-to-use electronic products.

Additionally, you can reduce fabrication costs without compromising on function or quality. If needed, Best Technology can source alternative components with equivalent functions and certifications to replace more expensive parts as well.

You may also like

How to Make a BOM?
星期四, 11 7 月, 2024

If you are familiar with SMT or PCB assembly process, you may know BOM file. It is an important element in the SMT process. Creating BOM is a crucial step in the manufacturing process, especially for PCBs. A BOM serves as a comprehensive list of all the parts, components, and materials needed to build your product. It ensures that everyone involved in the production process is on the same page, reducing the risk of errors and delays. Today, Best Technology would like to introduce BOM and giving you a guide to create a BOM file step by step.

How to Make a BOM?

What is a Bill of Materials (BOM)?

A Bill of Materials (BOM) is a detailed list of all the parts, components, and materials needed to manufacture a product. In PCB manufacturing, a BOM outlines every item required to assemble a PCB, including quantities, part numbers, and descriptions. It serves as a guide to ensure that the manufacturing process runs smoothly and that no crucial components are missing.

Types of Bill of Materials

There are several types of BOMs used in different stages of production. Each type serves a specific purpose and provides unique details to streamline processes and ensure accuracy. Here are the primary types of BOMs:

  • Engineering BOM

This type of BOM is creating during the design phase. It lists all the parts and components designed by the engineering team, including specifications and relationships as intended in the final product. And of course, it mainly used by design engineers to communicate the product structure and details to manufacturing teams.

  • Manufacturing BOM (Formal)

It is a formal BOM files that used in the assembly phase. Different with engineering BOM, it includes additional details necessary for manufacturing, such as packaging, handling instructions and assembly details. And some special instructions.

  • Sales BOM

Sales BOM is used by sales teams and includes information relevant to the sales process, such as pricing and availability. It helps in providing accurate quotes, managing customer expectations, and handling sales orders efficiently.

What Should Include in an Effective Bill of Materials?

An effective BOM should be detailed, accurate, and easy to understand. It should include all the details of components and indicated revisions. As a 18 years expertise in PCBA production, we summarized the key elements that should be included in the BOM.

  • Component details

It should include all the components and their detailed information, such as names, part numbers (PN), and descriptions for each part.

  • Quantity (QTY)

The exact quantity of each component required for the product. Accurate quantities can prevent shortages and overstocking.

  • Foot print

It is the package of each component, helping to ensure the correction of part.

  • Reference Designators

Unique identifiers that match each component to its specific location on the product layout. These are essential for assembly and troubleshooting.

  • Manufacturer Information

Manufacturer information, including the manufacturer name of components and manufacturer part number. It helps to ensure correct parts are sourced. And convenient for alternative part sourcing if it is shortage.

  • Supplier information (Optional)

It means the name of the supplier or distributor. The part number used by the supplier, which may differ from the manufacturer’s part number.

  • Assembly instructions

Any special notes for assembly such as DNF remark, and version control to track revisions should also be included. Additionally, cost information helps in budgeting, and lifecycle status information helps plan for component availability and avoid discontinued parts.

How to Make a PCB Bill of Materials (BOM)?

Creating a PCB BOM is a systematic process that involves compiling all the necessary information about each component required for the assembly of the PCB. Here’s a detailed guide on how to create a PCB BOM:

  • Open a Blank Spreadsheet

Use software like Microsoft Excel or Google Sheets to start with a blank spreadsheet. They are common to use, offering flexibility and ease of use for creating and managing BOMs.

  • Define Columns

Set up your spreadsheet with appropriate column headers. Common headers include:

  • Part Number
  • Component Name
  • Quantity
  • Reference Designator
  • Manufacturer
  • Manufacturer Part Number
  • Supplier
  • Supplier Part Number
  • Description
  • Package Type
  • Cost
  • Notes
  • Input Data

Enter the required details for each component under the appropriate headers. Please be make sure that all information is accurate and complete. This may involve referencing design files, datasheets, and supplier catalogs. If it is incorrect, then it needs a lot of time to find out and revise the errors, resulting in schedule delay.

  • Use Formulas

Utilize Excel formulas to automate calculations, such as summing total quantities or calculating costs. This helps in reducing manual errors and saves time.

  • Format for Clarity

Use cell formatting options to highlight important information and ensure the spreadsheet is easy to read. For example, you can use bold text for column headers, color coding for different component types, and borders to separate sections.

  • Include Version Control

Add a version control section to your BOM to track revisions and updates. This can be a simple row at the top or bottom of the spreadsheet, indicating the version number, date of revision, and a brief description of changes.

How to Make a BOM?
(BOM file reference)
  • Save and Update

Save your BOM and update it regularly to reflect any changes in the design or component availability. Regular updates ensure that the BOM remains accurate and up-to-date, preventing issues during production.

  • Review and Verify

Have multiple team members review the BOM for accuracy. Cross-check all component details, quantities, and part numbers against the design files. Verification helps catch errors early and ensures the BOM is reliable.

  • Communicate with Suppliers:

Maintain open communication with suppliers to confirm component details and availability. This ensures that you can source the correct parts and avoid delays in the production process.

How Can I Optimize My BOM for PCB Assembly?

Sometimes, a simple BOM is not good to process PCB assembly process, and manufacturers may need to spend a lot of time to optimize it, make into convenient for manufacturing. If you are a layman, here are some steps to help you in optimizing your BOM file.

First, it’s a good idea to standardize components where possible. Using standard parts that are readily available from multiple suppliers can simplify procurement and reduce costs. This approach minimizes the risk of shortages and ensures you can get parts quickly and affordably. Also, make sure all entries in your BOM are clear and concise to avoid confusion during assembly. Double-checking part numbers and quantities against design files is crucial to prevent errors that could lead to rework or delays.

Building strong relationships with your suppliers is another key factor. Good communication with suppliers helps ensure reliable component availability and keeps you informed about any changes in lead times or part availability. Regularly updating your BOM to reflect any design changes or component availability issues is essential. Keeping your BOM current and accurate prevents last-minute surprises during assembly.

How to Make a BOM?

What Common Mistakes Should I Avoid When Creating a PCB BOM?

Avoiding common mistakes in BOM creation can save time and reduce errors. Here are some pitfalls to watch out for:

  • Incomplete information – ensure all necessary details are included for each component.
  • Incorrect quantities – double-check quantities to avoid shortages or excess inventory.
  • Outdated data – keep the BOM updated with the latest design changes and component information.
  • Ambiguous descriptions – provide clear and precise descriptions to prevent confusion.
  • Lack of version information – implement version control to track changes and ensure the correct BOM version is used.

Creating an effective and accurate PCB BOM is essential for smooth manufacturing and assembly. By following best practices and using the right tools, you can ensure your BOM is comprehensive, clear, and up-to-date, ultimately leading to a successful PCB production process.

Best Technology is an expert in SMT and PCB assembly, we have more than 18 years in this industry, that can offer you a best experience of PCBA solution. In our facotry, we have advanced equipment like full auto pick and place machine, online dual AOI, X-ray, 3D SPI, nitride reflow oven and three-proof paint machine. So that we can ensure the fast lead time and high quality of your PCBA products. Reach us to get a instant quote!

You may also like